Guides
How to Install and Activate Visual Studio: A Complete Guide
This comprehensive guide will walk you through the entire process of installing and activating Visual Studio. Whether you are a beginner or an experienced developer, you will find all the steps needed to get your Visual Studio up and running.
1. Download and Setup Visual Studio
Go to the official Visual Studio website at visualstudio.microsoft.com.
- Choose the version that suits your needs, whether it’s Professional, Enterprise, or another.
- Click the “Download” button to begin the download process.
- After the download finishes, run the installer and follow the instructions.
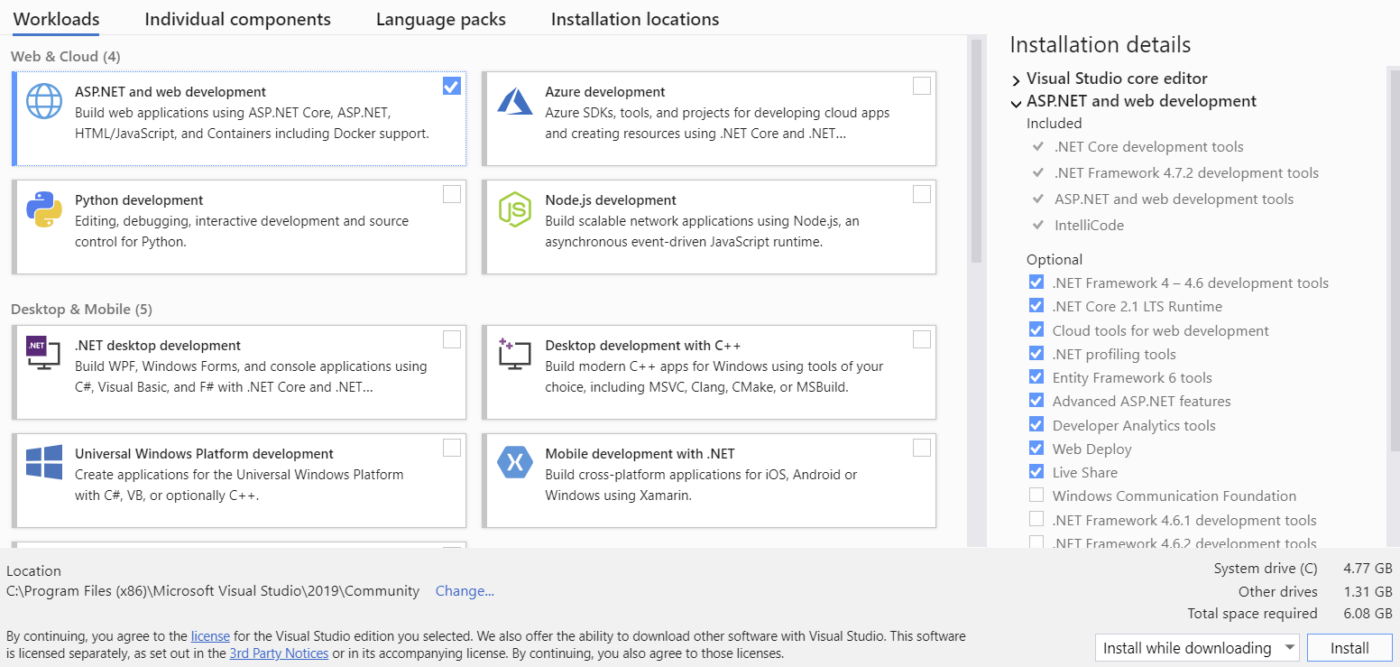
- During installation, you’ll be asked to select the development workloads you need.
- Once selected, click “Install” and wait for the process to finish.
2. Activate Visual Studio
Once installation is complete, open Visual Studio.
- On your first launch, sign in with your Microsoft account.
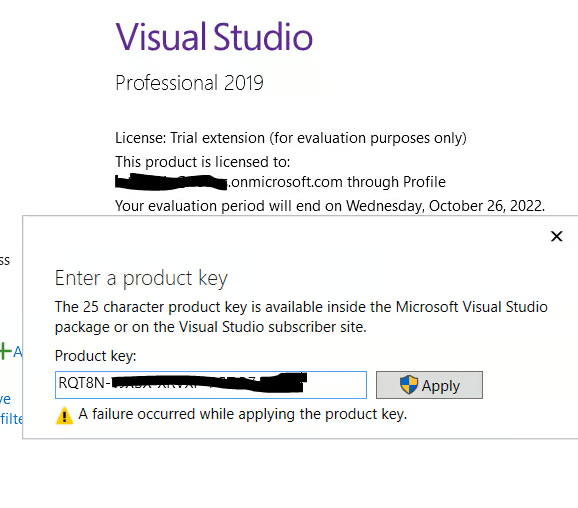
- If you have a product key, click on Help > Register Product, enter the key, and complete the activation.
3. Keep Visual Studio Updated and Start Developing
To keep your Visual Studio up to date, navigate to Tools > Get Tools and Features.
- Click on “Update” in the Visual Studio Installer to download and install any updates.
- Once everything is up to date, you’re ready to start coding.
- Open the New Project window, select a template, and start building your applications!
Need Help?
If you experience any installation or activation issues, our support team is available 24/7. Get fast assistance via live chat at https://windowskeys.uk/ or email us at [email protected].